

Sprouting 101
- Austin

- May 22, 2018
- 4 min read
Some people say they are the healthiest of foods, the 'living foods'. This article is a play by play into my journey growing my own fresh food indoors in April 2018. I was given a three level planting tray that comes equipped with fluorescent growing lights, which I draped in plastic wrap to create a small greenhouse. I purchased a few seeding trays from the local hydroponics supply store, Best Friends Forever on Queen St. West, in addition to the handful of trays I had lying around. I thoroughly sanitized all trays before and after sprouting with a bleach and water solution.
I have kept red wriggler worms for nearly 8 months now in a 100 litre rubbermaid container and this has given me bountiful amounts of nutrient rich organic soil for use in my indoor gardening projects, while reducing my waste outputs. Click here for more information about my ongoing composting journey with red wriggler worms!
I visited an organic heirloom seed bank called Urban Harvest on Bloor Street. Choosing reputable and good quality organic seeds is a crucial part of sprouting safely. I had many questions, and the staff here were very helpful in providing clear answers and friendly guidance to me! After speaking with the owner, I was informed that there are two main types of seeds available for sprouting: those that are grown in soil, and those that are grown in water. I picked up $5 sample packs of a number of seeds: broccoli, sunflower and speckled peas for soil, and clover and alfalfa for water sprouts. More specifically, seeds grown from soil are known as microgreens, and in water are known as sprouts. Click here for an infographic that describes the difference between sprouts and microgreens. This article is about microgreens, for information about sprouting, please read our article Sprouts.
Learning is everything, and I learned a lot from this project. This was designed to be an experiment to see how to create a cycle that is able to produce fresh food every day. In this way, I planted all of my seeds at the same time to understand their comparative germination rates and experimented with different types of soil. Although my experiment wasn’t perfect, I got a lot of valuable information.

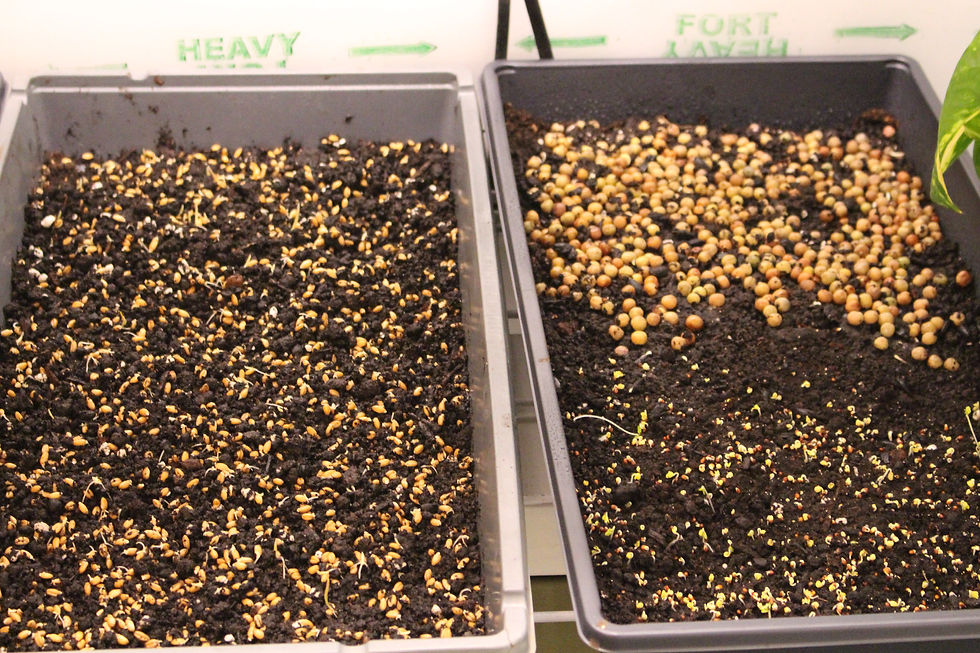
Seeds should be soaked in clean, chlorine free water overnight and rinsed prior to planting. One issue that I faced early on is from not soaking the seeds sufficiently. Different seeds require differing soaking periods and I planted the seeds (mistakenly without pre-soaking) directly on top of two trays each with an inch of soil prior to leaving for the weekend. I had asked a friend to water them twice per day when I was out of town. When I returned home i noticed the sprouts hadn’t received enough water, and only a handful germinated. I collected up as much of the unsprouted seeds as I could and soaked them in jars overnight with the exception of the broccoli seeds were too small to pick up and got enough water just from misting and did well. I also started one jar of alfalfa in water. Unfortunately these seeds sat in the water too long and I didn’t feel comfortable eating them. Oops! Back to the worm bin for you!
Update: Seeds were planted on April 6, Today is April 11 and most of all the seeds have sprouted. They are still in the seeding trays with another tray on top to conserve moisture.
I harvested the Broccoli sprouts after one week. If the seeds were properly soaked the time from soak to harvest would have been five days. I didn't harvest as much broccoli sprouts as i could have, because some of the plants were underground. Broccoli is one of the healthiest foods around with high concentrations of a chemical called sulphoraphane, which has recently received a lot of attention for it’s multitude of health benefits. Broccoli sprouts have an intense taste which is sometimes too much so for some people. A little goes a long way!

The wheatgrass has sprouted a handful of seeds, all of them white. After a few hours of exposure to light, the white shoots started to green up as chlorophyll was produced.

Nine days after planting I harvested the first batch of sunflower seeds which were ready for harvest. I could have waited another day but Amy and I were excited to try them with our dinner!
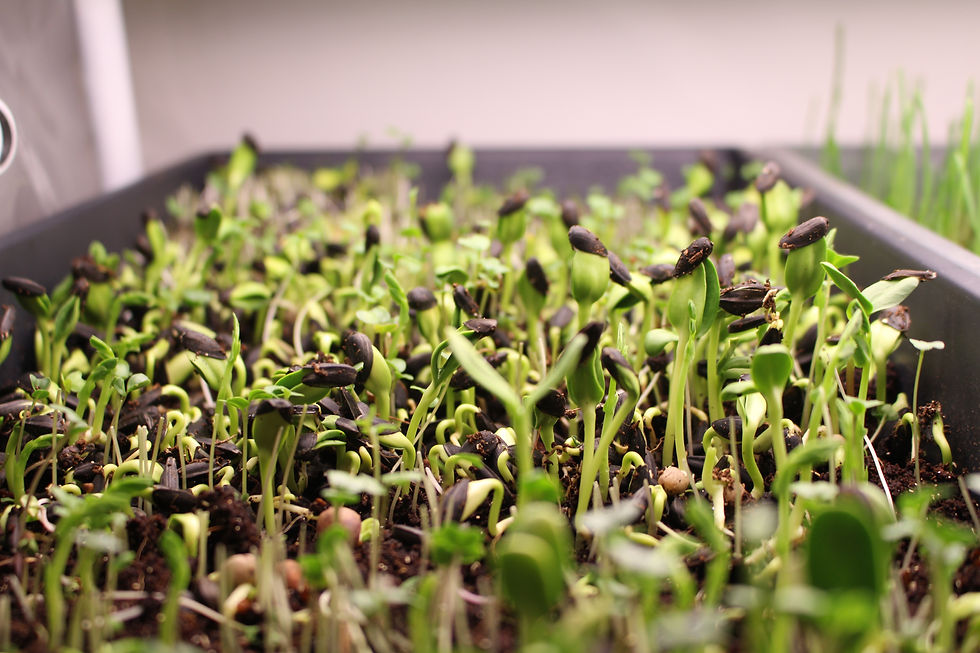
They were so delicious with a great firm texture, deep green color and slightly nutty flavor. We used them as a bomb sandwich topper to add extra living nutrition to our food. It is dawning on me that this food is the freshest and healthiest food I’ve ever eaten in my life. Cool!

Monday April 16, Wheatgrass has sprouted fully and is ready for the first harvest. This is shown by the presence of the second blade of grass showing. I anticipate being able to get two harvests out of this batch. The tray will be cut and watered and allowed to continue growing under the lights for another week or so.


Looking at this cycle, I see the following harvest times from initial soaking:
Broccoli: 5-6 days
Sunflower: 8-9 days
Peas: 10-12 days
Wheatgrass: 10 days first harvest.
Starting three seperate trays at the same time would allow a steady flow of microgreens into the diet, and three jars of sprouts could fill in the gaps in days without harvest.
Comments